Wednesday, April 14, 2010

Ribs and Floors


Jacking starboard planks into line
After the summer break work began again in mid January. In preparation for patching some damaged ribs I bought a small 230mm Ryobi bandsaw, and was devastated when it wouldn't cut the white oak I had bought for the job, at least not with any accuracy. I suspected the blade, and as fate would have it broke the factory one very early on. A saw doctor recommended a coarser, wider (8mm) blade, and it was like having a different bandsaw! I also bought a fixed disc sander and drill press to help with this phase.

Jado was now in a cradle rather than on the trailer, keeping her plumb and straight so that some reconstructive surgery could take place. We had found a series of about five ribs, near the stern on the starboard side, all cracked at the turn of the bilge. This led to the planking developing a slight chine on this side. One by one the failed sections were removed, planks jacked into line, and new oak pieces scarfed in. The aft-most floor timber was also replaced with the original type and various small repairs done before the area could be primed.

Some decisions need to be made about the aft bulkhead, as what's there now appears to be much modified. However, I have no pictures of this part of the boat before her Fishing Machine days. It looks as though there was no aft seat, only side seats with the fuel tank under the starboard one. The empty space under the aft deck was then storage space, and the bulkhead fitted with cupboard doors. What was there originally?

One Step Forward, Two Steps Back...

By this time the original master plan had been revised umpteen times, and every bit of progress had been countermanded in some way. The most frustrating issues were with the repairs made by Peter Murton, both before and after I bought Jado. I began to think of him as the Jekyll and Hyde boat builder. Here's a summary of work that he did:

- Remove, repair and replace stem. Not a job for the faint hearted, unfortunately the old stem was so past it I can't believe it was ever re-installed. This and lots of brass screws!
- Replace damaged floor timbers x 3: Peter made wonderful laminated kauri floors and fitted them. Unfortunately he used rubbishy stainless screws, and a few brass ones, to fasten them through the planking. Plus the low profile of these timbers will not support the floorboards, so they will have to come out and the correct type fabricated.
- Build and galvanise trailer. A very nice trailer it is, too, unfortunately the axle had evaded the galvanising process somehow, the trailer had to be dismantled for this.
- Install engine beds. The originals had been chopped out as can be seen in the first post, presumably to give access for some other repair. Peter's new ones were nothing like these, and will be removed and replaced.
- Replace 7 ribs. Actually I can't fault this, apart from the fact that there were many more ribs needing attention.  [As it turns out, the one-piece originals were replaced with two-piece ones, butt joined in the centre.  I have scarfed in joints over the keelson to strengthen this area, as there isn't much support from the cross floors here.]
- Seat Risers. Again the originals sucumbed to the prybar and hammer to give access for rib replacement. New ones were made, but they don't accurately follow the shape of the originals and will be replaced.

Tuesday, April 13, 2010

Summer Holidays


Over the Xmas and summer period work took precedence and very little progress was made. However, I was able to buy some fittings to put aside for a later date, including engine mounts.

I had been contemplating what to do about fuel tanks. The originals were twin copper ones, under the aft deck either side of the rudder post. Whether they developed problems, who knows, but possibly with the conversion to diesel in the 80's these tanks were removed and a single stainless one fitted under the starboard side seat. I was not looking forward to costing up new copper jobs, but spotted a twin pair online in November and bought them for $200.00. The size is right - Jim remembers the capacity as 12 gallons, these are about 50 litres each - and the proportions are almost perfect. I had them freighted to Auckland and took them to a metal dippers on Rosebank Rd to have them cleaned out. On completion I got the call. Good news, they didn't leak. Bad news, they are mild steel with copper plating, which is no more. Aagh! Off to an electroplaters to enquire about copper plating - maybe it would've been cheaper to make new ones after all. The guy looked at them, then pulled out a scotch pad and buffed a small patch. Underneath the grey etch finish: beautiful, shiny copper!

A New Nose


On November 6th I collected Jado, upright once more, from Herbert's shop. Essentially the first four inches of boat had been replaced - the outer stem, leading edges of all the planks, and the first few feet of both garboard planks. It made a huge difference and was definitely money well spent.

Trailer Time

With Jado squirreled away in Herbert's shop for the next few weeks I had time to do some work on the trailer. This had been built new by Peter Murton, a good trailer I thought, until I realised that the axle hadn't been galvanised. So, off with the wheels, springs, hubs, and off to the dippers it went. Next I removed the timber runners and found - oh dear - all the bolt holes had been drilled post-galv, these needed a zinc touch-up. I painted the timber a pale grey, and figured the 200 x 50 walkway needed some anti skid coating. Off with the kids to Browns Bay to sieve some sand into a bucket, then home to sprinkle it over a wet coat of paint. Next day, brush it off and coat once more - done! The side bunks will have to be modified to support Jado's hull, but can't do that until she's back on the trailer, and that could be a while...

Some Professional Help


By far the most doubtful area of Jado's hull was the stem. When she had been wrecked some ten years ago the stem had been split and some lower planking badly damaged. Peter Murton had removed the stem, repaired it and re-installed it. Fair enough, but what is absurd is that the whole forefoot was in such poor condition that it should have been replaced. Too bad, Peter had welded it in place with two generous beads of epoxy down each side, and countless brass screws, also epoxied in for a good measure. Herbert at Classic Boats NZ had some ideas on how to correct this eyesore, so I made my booking and delivered her to his workshop in rural Kumeu on October 8th. These photos, taken a couple of days later, show the cracked and worm-eaten pohutakawa gripe, and lower planks bogged up with sawdust and epoxy. More brass screws are evident in the last photo, securing one of Peter's laminated floors.

Engine Decisions

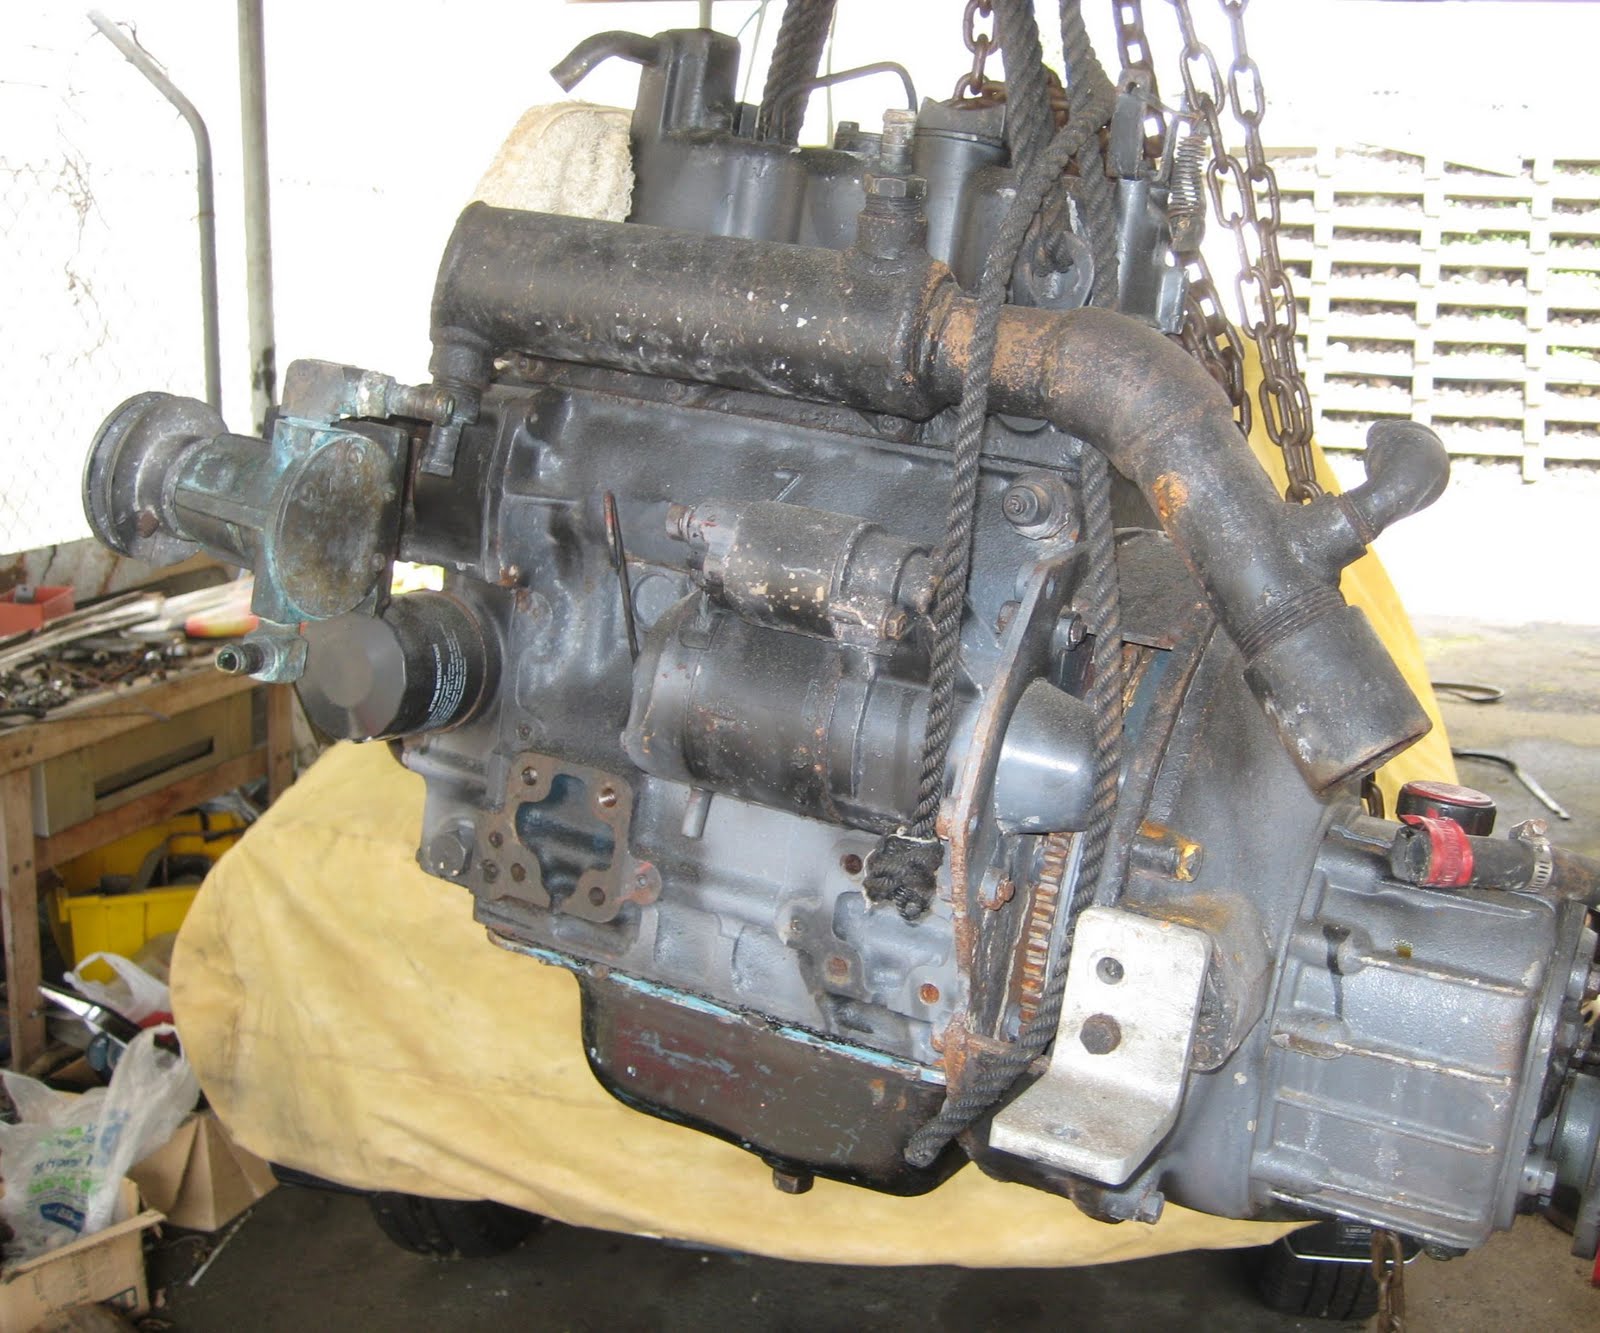
Before Jado had even arrived in Auckland I had already bought an engine and gearbox, for want of anything else to do whilst I waited for Peter to complete his work in Nelson. This was a Kubota D750 diesel, 3cyl 18hp, very common and well regarded. However, as the project veered from casual refurbishment to earnest restoration I decided that the original powerplant was what I needed. This had been a Ford Ten sidevalve with a Parsons forward/reverse gearbox. After doing some homework on these engines I opted for the 100E motor, identical in almost every way, but with a few significant upgrades over the older motors (a water pump, for one!). I bought one of these in early October, and am still on the lookout for a Parsons marine box. A 1:1 Paragon was purchased in February 2010, but mating this to the Ford would be a lot of work, so still keeping my eyes peeled.


Kubota D750 diesel with Droffin 2:1 gearbox
Paragon gearbox, ex Holden six.


Ford 100E sidevalve petrol motor.